Welcome To
MyJonBoat.com
"How To" eBooks
*Online Since 1998
Browse Our Site:
Jon Boat Videos
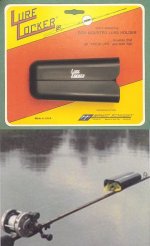
LURE LOCKERS: 
Podcast
From Ray
About
The
Jon Boat To Bass Boat Book
Mouse Over Links For Info
Jon Boat "Hall Of Fame"
A Tackle Accessory
You Won't Find
Anywhere Else!
|
You'll Save BIG On A Custom Bass Boat
In More Ways Than One |
Customer's Comments
Just to let you know I received your book today, and I am very pleased with it. I can see that the information it contains will save anyone embarking on such a project a lot of wasted time and effort.
So often when you have an idea to make something, you spend hours pondering over suitability of materials, trying to spot potential design faults, and despite your best efforts, there is almost always something that you wished you had done differently when the job is finished
Admittedly, there is satisfaction when you have ironed out all your teething problems and you have designed and completed something useful, but you can't beat experience, even if it is from someone else.
All the best,
Paul B.
Kent, England
Hi Ray,
Thanks again for the fantastic book. My boat is great. Roll on fishing season in the UK which starts in June. Had a lot of people asking where to get a boat like mine!
Best Regards,
Phil
Ray,
I bought your book about a year and a half ago. At the time I did not even
have a jon boat. I ended up buying a 14ft fiberglass, v-hull and a 1967 20HP
merc for $400.00. While many of your concepts were specific to aluminum, I
was able to incorporate many of your ideas. I have attached pictures of the
“In the making” and finished product.
I thought maybe you would like to use these on your website. Keep in mind that I am no electrical, painting, carpeting or wood working expert. This really can be done by anybody who has the time and desire. Al in, I have about $3,000. Could have been done for cheaper but I selected real high quality electronics, wood, hardware, paint and batteries. It could use a new motor. One day I will buy a merc 4 stroke 15HP with electric trim and start which will double my all in cost.
Boat Characteristics:
1972 Fiberglass, V-Hull (Maker unknown)
1967 20 HP Merc (Cleaned up by local boat engine repair)
Decking made of ¾” treated plywood and marine grade carpet bought at lowes.
All wood coated with polyurethane. ($300)
Substructure to support decking made of treated 2x4 ($100.00)
Interior paint is Interlux Brightside Fiberglass Topcoat ($105.00)
Hull paint is Interlux fiberglass bottomkote Antifouling ($105.00)
Fiberglass hull repaired on bottom ($50.00)
Minn Kota 55LB Thrust Powerdrive with Universal Sonar (Fish finder sonar) and Co-pilot remote control steering; Remote fits on fishing pole – no foot pedal required ($650.00 on ebay)
25LB Electric Anchor Winch ($125.00)
Hummingbird 525 Fishfinder ($119.00)
Bow light/Stearn Light ($30.00)
Toho rig Livewell prebuilt with transom pump and aerator (Purchased at Bass Pro for 179.00)
Automatic bilge pump for transom ($45.00)
Custom hatch 30”x18” bought at bass pro ($59.00)
2 bank battery charger 10AMP ($100.00)
2 batteries – 1 for trolling motor and one for all other electronics ($160.00)
2 pedestal seats and 1 rear cushon seat ($150.00)
All electronics connect to a marine grade resettable fuse switch with 6 ports ($50.00)
Wiring 16, 14, 12 and 8 gauge as required with quick disconnects on all equipment ($150.00)
Hardware is all stainless with button washers for bolting deck to substructure ($100.00)
I am proud of it. I have gone out on it once and I love it! Thanks for the inspiration.!! I had tons of fun building it! I hope you enjoy the customer satisfaction as much as I will enjoy the boat! Feel free to call me to discuss anytime!
Hello Ray,
Thank you for taking the time to come up with a "How-To-Book" to help with the process of customizing Jon Boats.
My project began with a brand new 16' Alumacraft Jon that is 48" wide. I started by running my 6 gauge wiring for the trolling motor down the right side through the V-channel. I cut garden hose and put it behind every rib so the wire would not touch any sharp edges. Since I kept all the factory benches, I ran electrical conduit to act as chasers. This made running wires and in one case livewell hose, very easy. I included a 60A breaker just off the battery which is recommended by Minn Kota. Down the left side I ran 12 gauge wire for my switch panel. I included a 20A breaker at the battery for added protection. All my ground wires go to a central location in a waterproof box. My sonar wire runs alone and never comes in contact with any other wire to cut down on any interference. Since I was mounting the trolling motor to a bracket, I decided to mount a plug, gauge and 12v outlet to it. The trolling motor plug is also used for charging the battery (thanks for the tip). The wiring section of the book was a huge help.
The decking was done with 1/2" plywood that was given two coat of polyurethane after every piece was cut, drilled, assembled for proper fit then taken back apart. The front support panel is the only piece where 2x4's were used for added support due to the access hole for front storage. I glued blocks to the top backside of every support panel so I wasn't edge screwing the deck down.
I took the advise of Kerry Lancaster and purchased my carpet and glue from www.boatcarpetbuys.com. I choose to only carpet the decking and support panels for now. I may do side panels and floors at a later date. I liked the idea of covering the edge of the boat but I opted to use Herculiner instead of carpet. As long as I don't drag a fishing line on it I should be ok..
The only thing left to do now is stencil realtree graphics down both sides and apply custom Alumacraft decals and registration numbers. I had a blast doing this and I thank you for your guidance and helpful tips.
Chris Balodis
A "MyJonBoat.Com" Success Story
(From "DevilJohn")
Howdy Ray,
After 3,000,000,000 man hours of labor (ok, exaggerated), I finally got my jon boat fish ready, and I have to tell you it is a work of art!! I modified your design somewhat, I didn't remove any of the bench seats, as I was slightly worried about structural integrity. The boat is old, had cracked ribs and lousy rivets.
Good Tip:
I used stainless bolts w/ nylon washers and non-hardening gasket sealer w/ nylock nuts to replace the lousy pop-rivet job done previously. Also, gooed all the remaining rivets beneath the waterline w/ Marinetex. So far the rivets/bolts are solid as Fort Knox. I used 1" right angle 1/8 aluminum bar stock to brace the cracked ribs on each side.Good Tip:
On the design, I cut a rectangular hole in the front bench and used the bench as a dry storage box/electrical terminal area. This was fairly easy, as I put in 1/2 ply in the bottom, and put a hinged/carpeted 3/4 lid with a hasp on the top. It is quite handy and didn't get wet. My boat has a fairly narrow beam (36" at the base) so I didn't install any side panels to cut down on weight. I used 1/2 ply for the front and rear floor decks (saving weight again), cutting notches for the ribs.I also added a 12'' wide strip of 1/2 " ply beneath the front deck from front to rear to support the front swivel seat which is mounted via stainless bolts and t-nuts, thus making removal of the seat a synch w/ socket or wrench w/o removing the deck or having nasty carriage bolts protruding upward.
Good Tip:
To hold the front deck down, I mounted a 2" strip of 1/8 aluminum bar stock across the front tied into the front rib and simply tied the rear in w/ a strip of 2" ply mounted vertically to the center bench. The rear deck is similarly held in place, tied in to the center bench w/ a strip all the way across and to the rear bench w/ a single block in the center, thus allowing a paddle etc to fit under the rear seat.Beneath all of the floor decking is 1/2 foam board (that pink stuff from home depot used for wall insulation, one 4x8 sheet was all I needed). The foam replaces the flotation removed from the front bench to make the dry storage box and adds support to the 1/2 ply decking.
Good Tip:
One mod I made, which I found to be quite handy, was the addition of a lantern pole holder. I put a stainless eye-bolt in the center of the front side of the front bench/dry box and drilled a 3/4" hole directly beneath the eye-bolt in the floor deck. Used a piece of electrical conduit about 6' long w/ a 6" eye-bolt and snap clip thru the top.This way, I can slide the pole into the eye-bolt and floor deck and support a Coleman lantern high in the boat. works like a charm. The eye-bolt also serves as a stop for the drybox lid.....btw the lantern pole (about $4 to fabricate) also serves as a great tarp support, lure retriever, underwear hanger etc.....
Good Tip:
Another addition.... 1-1/2" PVC pipe rod holders. Drilled 3/4" hole 3-1/2 inches from the top of a 12'' piece of PVC, used dremel w/ cutoff wheel to make a slot and rounded the edges. I mounted 7 of these around the boat, one #10 stainless bolt through the gunnel up top and another bolt through the edge of the rib brace at the side V, thus no hole drilled through the boat below the water line.
Magness Enterprises
Website Design By
Home
-
About This Jon Boat
-
Conversion Cost -
eBook Download Info
-
eBook CD Info
The rod holders are awesome for this size boat, two guys w/ three rods each have nada problema, also, can anchor the boat sideways in current by attaching a 8' rope w/ clip to the bow and clipping in the anchor line from the rear seat. Using the rod holder on that side, I have an adjustable "V" anchor system which I can easily tie off and loosen or tighten to put the boat sideways in a river. The rod holders also can dangle the lantern pole over the sides and rear...callin in all those bait fish at night.
One question, I put a 1-amp fuse in-line on the bow/stern lights, which btw I wired in
parallel vs. series. The 1-amp fuse promptly blew, so I used a piece of wire cut to fit and skipped the fuse part on the maiden voyage. What amp fuse do you think I need and is one really
necessary??
Another quirk on the electrical system is erratic behavior of the depth finder with the trolling motor on. LED screen of Humminbird 200DX gets erratic when Endura motor is running. (I have the transducer/temp wires running parallel to the 6-gauge trolling wires and 12-gauge stern light wiring...could be a problem?? Or perhaps the depth finder is not getting enough juice when the motor is drawing power)?
I was glad to have found the MyJonBoat.Com link on the net, as your publication helped me to do the job right the first time. Feel free to use any of my mods/ideas in your future publications. I can send you some photos in the future if you would like.
Take care and drop a line...next project, wider jon w/ front stick steering and jet-outboard prop!!! A CAD dwg of my design is attached in GIF format. (btw as if you couldn't tell by my compulsiveness, I am an Engineer by trade)
J D
Hotlanta, GA
PS: the maiden voyage was 3 days on the Ocmulgee river just north of Macon, GA. It is shallow and at times swift. We got rained on and I whacked a chunk of the skeg off on a rock, but the hydrilla, which I have named the "Sandlapper" (after my roots in the Palmetto State of South Carolina) performed like a charm.
Dirt from camping was easy to wash out on the short pile outdoor carpet I used, In the morning, all I had to do wash splash her off w/ a cup and run at speed w/ the plug pulled. This
Friday I hit the Oconee River for the Hybrids.…
Happy Fishin!!
JD
23853 C.R. 114
Iola, Texas 77861
1-877-968-6878
Magness Enterprises
Printed Book+CD Info
-
Jon Boat Accessories
-
Lure Lockers On Video
Emu Oil For Sunburn -
Jon Boat Links & More
-
Prices
& Extras Info
V-Bottom Jon Boats
-
Customer Kudos
-
Bassin' Buddies e-Greet
Order
-
Free Preview eBook
Info
-
Jon Boat Hall Of Fame
Used Jon Boats -
Aluminum Jon Boats -
Jon Fishing Boat
About Us - Privacy - Tackle
- Jon Boat Videos -
Site
Map